

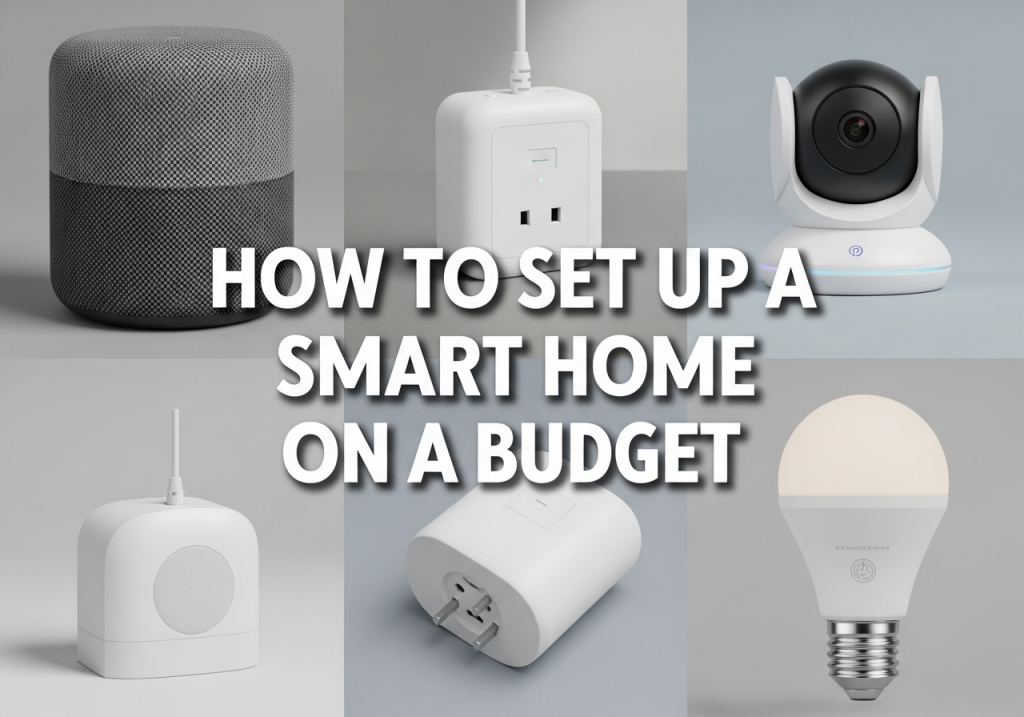
Dreaming of a smart home where lights obey your voice, doors lock themselves, and your coffee brews just as you wake up? It sounds fantastic, but often, the first thought that comes to mind is the hefty price tag. Many believe that a truly integrated, convenient smart home is reserved for those with deep pockets. But what if I told you that couldn’t be further from the truth? This comprehensive guide will show you how to embark on a budget smart home setup, making an affordable smart home a reality. We’ll dive into the world of cheap smart home devices, proving that a DIY smart home is not just possible but incredibly rewarding, even for smart home for beginners. No need to break the bank to enjoy the comforts and efficiencies of modern smart living.
What are the Most Essential Smart Home Devices?
Alright, so you’re ready to dip your toes into the smart home pool, but you’re probably thinking, “Where do I even begin? What are the most essential smart home devices when money is a factor?” It’s a valid question, and the answer, thankfully, isn’t as complicated (or expensive) as you might imagine. The key is to start with the foundational elements that offer the most bang for your buck and pave the way for future expansion.
The Brain: Your Best Budget Smart Assistant
Every smart home needs a brain, a central command center that understands your wishes and communicates with your devices. Forget those pricey wall-mounted touchscreens – the most accessible and best budget smart assistant options come in the form of smart speakers.
- Amazon Alexa (Echo Dot): Your Conversational Companion
- The Amazon Alexa (Echo Dot), particularly the latest generations, is an absolute powerhouse for its size and price. You can often snag one for under $30, especially during sales events. It’s incredibly versatile, capable of playing music, answering questions, setting timers, and, most importantly, controlling a vast array of smart devices.
- Pros: Wide compatibility with thousands of smart home devices and skills, intuitive voice control, excellent for beginners, frequent discounts.
- Cons: Can sometimes feel less “integrated” with other Google services if you’re an Android heavy user; privacy concerns (like any voice assistant) are always worth noting.
- Use Cases: “Alexa, turn off the living room lights.” “Alexa, play my morning playlist.” “Alexa, what’s the weather like today?”
- Google Assistant (Nest Mini): The Smart Sidekick for Google Enthusiasts
- Similarly, the Google Assistant (Nest Mini) is Google’s answer to the Echo Dot, offering comparable features and an equally attractive price point. If you’re heavily invested in Google’s ecosystem (Android phone, Google Calendar, YouTube Music), the Nest Mini often feels like a more natural extension of your digital life.
- Pros: Superior voice recognition (often understands more complex queries), seamless integration with Google services, great sound for its size, excellent for multi-user households.
- Cons: Device compatibility, while extensive, might not be as universally broad as Alexa’s for obscure devices; some users prefer Alexa’s more direct approach to smart home control.
- Use Cases: “Hey Google, dim the bedroom lights to 50%.” “Hey Google, add milk to my shopping list.” “Hey Google, set a timer for 15 minutes.”
- Apple HomeKit: The Premium Path (with Budget Workarounds)
- While devices directly compatible with Apple HomeKit tend to be on the pricier side, it’s still worth mentioning. If you’re an iPhone, iPad, or Mac user and prioritize privacy and seamless integration within the Apple ecosystem, HomeKit offers a superb experience. The HomePod Mini (often around $99) serves as the budget-friendlier HomeKit hub.
- Budget Hack: For the tech-savvy DIY smart home enthusiast, Homebridge is an open-source solution that allows you to bring non-HomeKit devices into the HomeKit ecosystem. It requires some technical know-how (and a dedicated device like a Raspberry Pi), but it opens up a world of possibilities for using cheaper devices with HomeKit.
My Suggestion: For truly starting on a budget, pick either an Echo Dot or a Nest Mini based on your existing phone/ecosystem preference. Don’t worry about getting both right away. You can always add the other later if you find a specific device works better with one assistant.
Connect Smart Devices Without a Hub (Mostly!)
One of the biggest misconceptions about smart homes is that you need a central hub, like a SmartThings hub or a Hubitat, right from the start. This is often where the budget starts to inflate. Good news: you can absolutely connect smart devices without a hub for many of your initial setups.
- The Wi-Fi Advantage: Many cheap smart home devices today connect directly to your home’s Wi-Fi network. This includes popular brands like TP-Link Kasa, Wyze, and Govee. They communicate directly with your router and, by extension, with their respective cloud services and your chosen smart assistant (Alexa or Google Assistant). This simplifies setup, reduces costs, and means fewer devices plugged into your router.
- Benefits: Simplicity, lower initial cost, fewer points of failure.
- Limitations: Can potentially congest your Wi-Fi network if you have many devices, some devices (especially battery-powered ones) might drain faster on Wi-Fi, and it’s not as robust a mesh network as dedicated smart home protocols.
- Understanding Zigbee and Z-Wave (for later expansion):
- While you can start hub-free, it’s good to know about Zigbee and Z-Wave. These are wireless protocols specifically designed for smart home devices. They create a mesh network, where each powered device acts as a repeater, extending the network’s range. They’re also very power-efficient, making them ideal for battery-powered sensors.
- When you might need a hub: If you decide to delve into a wider range of sensors, locks, or more advanced automations, or if you find a great deal on a Zigbee/Z-Wave device, you might consider a dedicated hub down the line. But for a budget smart home setup for beginners, stick to Wi-Fi devices.
The Powerhouses: Affordable Smart Plugs
If there’s one device that screams “smart home on a budget,” it’s the smart plug. These little gadgets are incredibly versatile and allow you to turn almost any “dumb” appliance into a smart one. They are truly affordable smart plugs.
- Why they’re essential: Imagine controlling your lamp, fan, coffee maker, or even your string lights with your voice or through an app, even when you’re not home. That’s what smart plugs do!
- Brand Examples:
- TP-Link Kasa Smart Plugs: Kasa (e.g., KP115, KP105) are a fantastic choice. They’re reliable, easy to set up, and don’t require a hub. Plus, the Kasa app is user-friendly.
- Wyze Plug: If you’re building out a Wyze ecosystem (which is also very budget-friendly), their plugs integrate seamlessly.
- Generic Wi-Fi Plugs (Meross, Gosund, BN-LINK): You can often find even cheaper options from less-known brands. Just be sure to read reviews to ensure reliability and compatibility with Alexa/Google Assistant.
- Use Cases:
- Turning a floor lamp on/off on a schedule or by voice.
- Controlling a fan remotely.
- Preheating your curling iron or coffee maker before you get out of bed.
- Setting up “away” mode for lamps to make it look like someone’s home.
The Illuminators: Cheap Smart Lighting
Smart lighting is arguably the most impactful and visible way to show off your smart home, and thankfully, there are plenty of cheap smart lighting options available.
- Why they are a great starting point: They immediately add ambiance, convenience, and a touch of “wow” factor. Plus, some smart bulbs can even save energy by allowing you to dim them or turn them off remotely.
- Types:
- Smart Bulbs: These screw directly into your existing light fixtures. They come in various forms: white, tunable white (changing color temperature), or full color.
- Smart Switches: These replace your existing wall switches. A single smart switch can control multiple “dumb” bulbs on the same circuit. While often slightly more expensive than a single smart bulb, they can be more cost-effective if you want to control several lights in a room.
- Brand Examples:
- Govee: Known for vibrant Govee LED strip lights and now offering increasingly affordable smart bulbs. They are fantastic for adding mood lighting, entertainment, or backlighting to TVs.
- Wyze Bulb Color/White: Excellent value. They offer bright, reliable lighting and integrate perfectly with the Wyze ecosystem.
- TP-Link Kasa Smart Bulbs: Similar to their plugs, Kasa bulbs are solid, hub-free, and easy to use.
- Generic Wi-Fi Bulbs: Many affordable options exist on Amazon. Again, check reviews!
- Energy Saving Aspect: Think about it – how often do you leave a light on unnecessarily? With smart lighting, you can set schedules, use motion sensors (if you add them later), or simply turn off forgotten lights from your phone, saving you a little bit on your electricity bill.
By focusing on these core categories – a smart assistant, a few smart plugs, and some smart lights – you’ll have a fully functional and impressive budget smart home setup without breaking the bank. This is truly how do I start a smart home on a budget?
Smart Home for Beginners
For anyone navigating the exciting world of smart tech, it’s easy to get overwhelmed by the sheer volume of devices and possibilities. That’s why, for smart home for beginners, the mantra should always be: start small, learn, and then expand. Don’t try to automate your entire house in one go! It’s all about the DIY smart home journey, one step at a time.
Phase 1: The Absolute Basics – Establishing Your Core
Your very first steps into building an affordable smart home should be focused on immediate impact and learning. This phase answers the crucial question: “how do I start a smart home on a budget?“
- Choose Your Assistant: Pick either an Amazon Alexa (Echo Dot) or a Google Assistant (Nest Mini). Get it set up, learn how to ask it questions, play music, and generally interact with it. This is your foundation.
- Add Your First Smart Plug: Find one lamp or appliance you use daily and plug it into an affordable smart plug. Link it to your smart assistant. Now, try saying, “Alexa/Hey Google, turn on the lamp.” Feel that rush? That’s the power of smart home!
- Integrate Your First Smart Light: Replace a frequently used bulb with a cheap smart lighting option (like a Wyze Bulb or a TP-Link Kasa bulb). Set it up with your assistant. Try turning it on, off, and dimming it with your voice. Maybe even change its color if you got a color-changing bulb from Govee.
- Example Scenario: Your bedside lamp is now smart. You can turn it off without getting out of bed. Your fan turns on automatically when the temperature hits a certain point (with a later added sensor). You’ve automated your morning coffee to start brewing as your alarm goes off. These small conveniences add up.
Phase 2: Adding Practical Conveniences – Enhancing Your Daily Life
Once you’re comfortable with the basics, it’s time to think about specific problems you want to solve or conveniences you want to add. This is where the DIY smart home spirit truly shines.
- Smart Cameras (Security on a Budget): If home security is a concern, Wyze Cam v3/v4 is an absolute game-changer. These are prime examples of cheap smart home devices that offer incredible features (1080p/2K video, color night vision, person detection, local storage via microSD) at an unbelievably low price. Place one at your front door, in a baby’s room, or in your living room for peace of mind.
- Pro Tip: Consider Wyze’s subscription service (Cam Plus) for cloud storage and advanced AI detection if your budget allows, but it’s not strictly necessary for basic functionality.
- Smart Sensors (Unlocking Automation):
- Door/Window Sensors: These little guys can tell you if a door or window is open or closed. They’re excellent for security alerts or for triggering automations (e.g., “If the front door opens after 10 PM, turn on the hallway light”). Wyze Sense (if you can find it) or Aqara (which might need a hub, but some have Wi-Fi options) offer budget choices.
- Motion Sensors: Great for turning lights on automatically when you enter a room and off when no motion is detected for a certain period. Perfect for hallways, bathrooms, or closets.
- Thermostats (A Slightly Bigger Step): While some smart thermostats can be pricey, there are more affordable options like the Ecobee Lite or certain Wyze thermostats that offer smart scheduling and remote control. This is a great step if you want to optimize energy usage for heating and cooling. Just be sure to check compatibility with your existing HVAC system.
Phase 3: Automation and Integration – Making Your Home Work for You
This is where the magic really happens – connecting different devices and actions to create seamless experiences.
- Routines and Scenes:
- “Good Morning” Routine: “Alexa/Hey Google, good morning.” This could turn on your bedside lamp, brew coffee via your smart plug, and tell you the weather and news.
- “Movie Night” Scene: “Alexa/Hey Google, movie night.” This could dim your living room lights, turn on your smart TV (if connected), and perhaps even change the color of your Govee LED strips behind the TV.
- Connecting Different Brands: This is a common question: “Can my TP-Link Kasa plug work with my Wyze camera?” Generally, yes, if they both integrate with your chosen smart assistant (Alexa or Google Assistant). The assistant acts as the bridge. You’ll link each brand’s account within the Alexa or Google Home app.
- IFTTT (If This Then That): For more complex automations that aren’t natively supported by your smart assistant, IFTTT is an incredible free service. It allows you to create “applets” that link services together.
- Example: “IF (Wyze camera detects motion) THEN (send a notification to my phone AND blink my Kasa light).” This level of customization truly embodies the spirit of a DIY smart home.
By taking these incremental steps, you won’t overwhelm yourself or your budget. Each phase builds upon the last, allowing you to discover what smart home features you truly value and how they can best enhance your daily life. It’s a journey of discovery, and you’ll be amazed at how quickly your budget smart home setup grows.
Budget Smart Home Setup: Unveiling Cheap Smart Home Devices
Now for the fun part: getting specific about which devices offer the most value. When it comes to a budget smart home setup, brand loyalty isn’t as important as finding reliable, affordable devices that integrate well with your chosen smart assistant. Let’s dive into some of the top contenders for cheap smart home devices.
Top Picks for Affordable Smart Home Devices
Finding the sweet spot between low cost and reliable performance is crucial. Here are some consistent winners in the budget category:
Smart Plugs: The Gateway to Automation
| Device/Brand | Price Range (Approx.) | Key Features | Pros | Cons |
|---|---|---|---|---|
| TP-Link Kasa | $10-$20 per plug | Energy monitoring (some models), compact design, easy setup | Highly reliable, no hub needed, Kasa app is great, consistent performance | Slightly pricier than generic alternatives |
| Wyze Plug | $10-$15 per plug | Dual outlets, Wyze ecosystem integration, Vacation Mode | Very affordable, two outlets per plug, seamless with other Wyze devices | Wyze app can get crowded with many devices |
| Meross/Gosund | $6-$12 per plug | Wi-Fi control, voice assistant integration, often sold in multi-packs | Extremely cheap, good for basic on/off, widely available | Quality can vary by specific model/batch, generic apps |
Why they’re great for a budget smart home: They turn existing “dumb” devices smart, offering instant control and automation without needing to replace the appliance itself. Start with one or two for your most frequently used items, like a bedside lamp or a fan.
Smart Lighting: Setting the Mood Without Breaking the Bank
| Device/Brand | Price Range (Approx.) | Key Features | Pros | Cons |
|---|---|---|---|---|
| Govee (Bulbs/Strips) | $10-$30 (bulbs), $20-$50 (strips) | Vibrant colors, music sync, scene modes, often Bluetooth + Wi-Fi | Excellent for ambiance/entertainment, good app, many options | Some models need Wi-Fi and Bluetooth connection |
| Wyze Bulb Color/White | $10-$15 per bulb | Full color/tunable white, high brightness, Wyze ecosystem | Great value, reliable, integrates with Wyze cams for alerts | Can be slow to respond occasionally, not as many scene options as Govee |
| TP-Link Kasa Smart Bulbs | $15-$25 per bulb | Tunable white or full color, no hub needed, energy monitoring (some) | Reliable, good app experience, bright, easy setup | Can be a bit bulkier than some competitors |
Why they’re great for a budget smart home: They offer immediate visual impact and convenience. Start with a few bulbs in high-traffic areas or a Govee strip for entertainment.
Smart Cameras: Eyes on Your Home for Less
- Wyze Cam v3/v4: Unquestionably the king of cheap smart home devices in the camera category. For around $30-$40, you get 1080p/2K resolution, color night vision, a wide field of view, two-way audio, and local storage via microSD. It’s an incredible value for indoor or outdoor (with an enclosure) monitoring.
- Kasa Spot Cam (by TP-Link): Another solid contender, often in the $30-$50 range. Offers reliable 1080p streaming, motion detection, and cloud storage options. Good if you’re already in the Kasa ecosystem.
- Yi Home Camera: Often found for under $30, Yi cameras offer decent video quality and basic motion alerts. They’re a good bare-bones option if you just need simple monitoring.
Smart Sensors: Enhancing Automation and Security
- Wyze Sense (Door/Window/Motion): These small sensors, often sold in kits for around $20-$30, are fantastic for basic security or triggering automations. Note that the original Wyze Sense required a bridge connected to a Wyze Cam, but newer versions (Sense v2) are sometimes Wi-Fi or have a simpler bridge. Always check compatibility!
- Aqara (Door/Window/Motion/Leak): While many Aqara devices are Zigbee and require an Aqara hub (which adds to the budget), they are incredibly tiny, reliable, and have long battery lives. If you decide to invest in a hub later, Aqara is a very affordable way to add robust sensing capabilities.
Where to Find the Best Deals on Budget Smart Home Devices
Finding cheap smart home devices isn’t just about knowing what to buy, but also when and where to buy them.
- Online Retailers are Your Best Friends:
- Amazon: Hands down the easiest place to find a vast selection, competitive pricing, and user reviews. Keep an eye on “Lightning Deals” and “Deal of the Day.”
- Best Buy & Walmart: These big-box retailers often price-match Amazon and run their own sales, especially around major holidays.
- Target: Similar to Walmart, good for grabbing essentials while doing other shopping.
- Manufacturer Websites: Brands like Wyze, TP-Link Kasa, and Govee often have sales directly on their own websites. Sometimes you can find unique bundles or early access to new products there.
- Major Sales Events: This is where you can truly score big on a budget smart home setup. Mark your calendar for:
- Prime Day (Amazon, usually July): Massive discounts on Echo devices and many third-party smart home gadgets.
- Black Friday & Cyber Monday (November): The biggest shopping event of the year, with incredible deals across all retailers.
- Memorial Day, Labor Day, 4th of July Sales: Good for smaller, but still significant, discounts.
- Back-to-School Sales: Sometimes good for smart assistants or plugs.
- Refurbished & Open-Box: Don’t shy away from these options from reputable sellers (like Amazon Warehouse Deals, Best Buy Open Box, or certified refurbished directly from manufacturers). They can offer significant savings, but always ensure they come with a warranty and a clear return policy.
- Bundle Deals: Many brands and retailers offer multi-packs of smart plugs or bulbs at a reduced per-unit cost. If you know you need several, this is a great way to save.
By strategically choosing your devices and shopping smartly, you can build an impressive and highly functional smart home without ever feeling like you’re overspending. Remember, the goal is an affordable smart home that genuinely enhances your life.
Advanced Tips for Your DIY Smart Home on a Budget
You’ve got your smart assistant, a few smart plugs, and some cool lighting. You’re feeling like a DIY smart home wizard, right? Excellent! Now, let’s look at some advanced tips that will not only enhance your current setup but also help you avoid common pitfalls and ensure your budget smart home setup remains efficient, secure, and ready for future growth.
Security & Privacy: Don’t Compromise Your Digital Safety
This is paramount. While cheap smart home devices make smart living accessible, it’s crucial not to skimp on security.
- Strong, Unique Passwords: Every smart device, every app, every account needs a unique, complex password. Use a password manager if you don’t already. This is non-negotiable. If one account gets compromised, you don’t want your entire smart home exposed.
- Two-Factor Authentication (2FA): Enable 2FA on every account that offers it, especially your smart assistant accounts (Amazon, Google) and individual device accounts (Wyze, TP-Link Kasa, Govee). This adds an extra layer of security requiring a code from your phone in addition to your password.
- Guest Wi-Fi for IoT Devices: If your router supports it, put your smart home devices on a separate guest Wi-Fi network. This isolates them from your main network where your computers, phones, and sensitive data reside. If a cheap smart device were ever compromised, it would be much harder for an attacker to access your personal files.
- Understand Data Collection: Be aware that smart devices collect data (voice commands, usage patterns, video feeds). Read privacy policies. While it’s hard to avoid completely, being informed helps you make decisions about what you’re comfortable with. For example, if you’re highly privacy-conscious, you might opt for local storage on your Wyze Cam over cloud storage.
- Regular Software Updates: Just like your phone and computer, smart devices and their apps receive updates. These often include security patches. Enable automatic updates where possible, or check for them regularly.
Network Considerations: Your Wi-Fi is the Lifeline
Your smart home lives and dies by your home network. Most cheap smart home devices use Wi-Fi, making your router incredibly important.
- Wi-Fi Coverage and Capacity: Do you have dead spots in your house? If your smart device can’t get a strong Wi-Fi signal, it will constantly go offline. Consider a mesh Wi-Fi system if you have a large home, but for a budget start, a good central router might suffice. Test device placement.
- 2.4 GHz vs. 5 GHz: Most budget smart devices connect to the 2.4 GHz band of your Wi-Fi network. This band has a longer range and better penetration through walls than the faster 5 GHz band. Ensure your router’s 2.4 GHz band is enabled and performing well. Sometimes, modern routers “steer” devices to 5 GHz, which can cause issues for some smart devices during setup. You might need to temporarily separate your SSID names (e.g., “MyWiFi_2.4GHz” and “MyWiFi_5GHz”) during setup.
- Router Capabilities: An old, weak router might struggle with many connected smart devices. If you’re planning to scale up your smart home, consider investing in a moderately priced, newer router designed to handle multiple devices. It’s an often-overlooked but crucial component of a stable smart home.
Troubleshooting Common Issues
Even the best budget smart home setup will encounter hiccups. Here are some common problems and quick fixes:
- Devices Offline:
- Check Wi-Fi: Is your Wi-Fi working?
- Power Cycle: Unplug the device (and your router/modem) for 30 seconds, then plug them back in. This often resolves connectivity issues.
- App Status: Check the device’s specific app (TP-Link Kasa, Wyze, Govee) for its status.
- Router Settings: Has the device been blocked or assigned a new IP address?
- Voice Commands Not Working:
- Assistant Online?: Is your Amazon Alexa (Echo Dot) or Google Assistant (Nest Mini) connected to the internet?
- Device Linked?: Is the specific smart device properly linked in your smart assistant’s app?
- Command Phrasing: Are you using the correct command? Sometimes slightly rephrasing can help.
- Re-discover Devices: In your assistant’s app, try “Discover Devices” to refresh the list.
- App Glitches: If an app is acting up, try force-quitting it and reopening it, or even uninstalling and reinstalling (you usually won’t lose your device settings).
Future-Proofing (Without Breaking the Bank)
You’re building an affordable smart home, but you still want it to last and adapt.
- Choose Ecosystems That Can Expand: While you’re starting with basic Wi-Fi devices, be aware of broader ecosystem plans. Brands like TP-Link Kasa and Wyze continually release new devices that seamlessly integrate. This allows you to grow your smart home without abandoning your initial investments.
- Consider Matter/Thread: This is a new universal smart home standard designed to improve compatibility between different brands and ecosystems. While most cheap smart home devices don’t support it yet, keeping an eye on it for future purchases can lead to a more truly integrated home down the line. A new smart assistant speaker (like the latest Echo Dots) often includes Thread/Matter support.
- Don’t Overcommit to One Brand (Initially): While there are benefits to staying within an ecosystem, avoid buying everything from one brand until you’re sure it meets all your needs. This allows you to mix and match the cheap smart home devices that offer the best value for each function.
Mistakes to Avoid: Learn from Others’ Oopsies
- Buying Too Many Devices at Once: This is the biggest rookie mistake. You’ll get overwhelmed, find it hard to troubleshoot, and end up with devices you don’t really use. Start small, as we discussed.
- Not Planning Your Setup: Don’t just buy random gadgets. Think about what problems you want to solve or what conveniences you want to add. “I want to control my living room lights,” or “I want to get alerts if my backdoor opens.”
- Ignoring Privacy Settings: As mentioned, take the time to review and adjust privacy settings on devices and apps.
- Choosing Incompatible Devices: Double-check that new devices work with your chosen smart assistant (Alexa or Google Assistant). Read product descriptions carefully.
By keeping these advanced tips in mind, your DIY smart home journey will be smoother, more secure, and ultimately, more satisfying. It’s about building a smart home that truly serves you, on your terms, and within your budget.
Connecting Your Smart Devices Without a Hub: The Wi-Fi Advantage
One of the most appealing aspects of building a budget smart home setup today is the widespread availability of devices that don’t require a dedicated smart home hub. This significantly reduces your initial investment and simplifies the entire process, making it incredibly accessible for smart home for beginners. Let’s delve deeper into the “no hub needed” approach.
How Wi-Fi Devices Work Their Magic
The principle is straightforward: instead of communicating with a central hub, these devices connect directly to your home’s existing Wi-Fi network – the same network your phone, laptop, and smart TV use.
- Direct Connection: When you set up a Wi-Fi smart device (like a TP-Link Kasa plug, a Wyze camera, or a Govee light strip), you typically use its dedicated app. During the setup process, the device connects to your home Wi-Fi router.
- Cloud Communication: Once connected to your Wi-Fi, the device communicates with its manufacturer’s cloud server (e.g., TP-Link’s cloud, Wyze’s cloud, Govee’s cloud).
- Smart Assistant Bridge: Your smart assistant (like Amazon Alexa (Echo Dot) or Google Assistant (Nest Mini)) acts as a bridge. You link the device manufacturer’s account (e.g., your Kasa account) to your Alexa or Google Home app. Now, when you issue a voice command (“Alexa, turn on the living room lamp”), your smart assistant sends that command to the manufacturer’s cloud, which then relays it to your device over your Wi-Fi network.
It’s a robust system that works surprisingly well for most common smart home tasks.
The Benefits of a Hub-Free Setup
- Simplicity and Ease of Setup: No complex pairing processes with a hub. You just need your Wi-Fi network and the device’s app. This is a huge win for smart home for beginners.
- Lower Initial Cost: This is the most obvious advantage for a budget smart home setup. You save $50-$150+ by not needing a dedicated hub.
- Fewer Points of Failure: With fewer devices in the chain, there are fewer potential points of failure. If your Wi-Fi is working, your devices should be too.
- Wider Brand Choice: Many popular and affordable brands (like TP-Link Kasa, Wyze, Govee, Meross, Feit Electric, Geeni) operate on Wi-Fi, giving you a vast selection of cheap smart home devices. You’re not locked into a specific hub’s compatibility list.
Limitations to Consider
While the Wi-Fi advantage is significant for an affordable smart home, it’s not without its drawbacks:
- Wi-Fi Congestion: If you have dozens of Wi-Fi smart devices, they can potentially put a strain on your router and Wi-Fi network, especially if you have older or lower-end equipment. While most home networks can handle 10-20 devices without issue, pushing into the 30s or 40s might require a router upgrade.
- Power Consumption: Wi-Fi modules in devices tend to consume more power than Zigbee or Z-Wave modules. This isn’t usually an issue for always-powered devices like smart plugs or lights, but it makes Wi-Fi less ideal for battery-powered sensors (which is why many sensors use Zigbee/Z-Wave).
- No Mesh Network (Inherently): Unlike Zigbee or Z-Wave, which create a self-healing mesh network where each powered device extends the signal, Wi-Fi devices typically connect directly to your router. If a device is too far from the router, its signal might be weak.
When a Hub Might Still Be Necessary (Later On)
While you can comfortably build a significant portion of your DIY smart home without a hub, there are scenarios where a hub (often a Zigbee or Z-Wave compatible one) might become beneficial:
- Extensive Sensor Networks: If you want many small, battery-powered sensors (door/window, motion, temperature, water leak), Zigbee or Z-Wave are far more power-efficient.
- Specific Device Compatibility: Some specialized smart locks, blinds, or specific professional-grade devices only use Zigbee or Z-Wave.
- Local Control and Reliability: Hubs often allow for more local control (automations run on the hub, not relying on the internet) and can be seen as more robust for mission-critical functions.
- Legacy Devices: If you come across older, cheaper Zigbee or Z-Wave devices second-hand, a hub would be necessary to use them.
For your budget smart home setup, focus on the excellent Wi-Fi options available. You can get incredible functionality from cheap smart plugs, cheap smart lighting, and affordable smart cameras without ever needing to worry about a hub. This keeps your initial investment low and your setup process simple, allowing you to fully enjoy the convenience of your new smart home.
Alexa, Google Assistant, and Apple HomeKit on a Budget
The smart home experience truly blossoms when your devices work together seamlessly. This integration is primarily facilitated by your chosen smart assistant. While you can often mix and match brands of cheap smart home devices, their ultimate symphony is conducted by either Amazon Alexa, Google Assistant, or, with some workarounds, Apple HomeKit. Let’s explore how each platform helps orchestrate your budget smart home setup.
Amazon Alexa (Echo Dot): The Universal Connector
The Amazon Alexa (Echo Dot) is arguably the most dominant force in the smart home world, especially for those prioritizing an affordable smart home. Its strength lies in its expansive compatibility and user-friendly interface.
- Strengths:
- Broad Device Compatibility: Alexa integrates with tens of thousands of smart home devices from virtually every major (and many minor) brand. This makes it incredibly easy to find cheap smart home devices that will “Works with Alexa.”
- Vast Skill Library: Beyond smart home control, Alexa offers “skills” for everything from ordering pizza to playing games, adding value to your Echo Dot.
- Affordable Entry Point: As discussed, the Echo Dot is one of the most cost-effective ways to get a smart assistant into your home.
- Routines and Groups: Easy to set up routines (e.g., “Alexa, goodnight” turns off all lights, locks the doors) and groups (e.g., “Living Room Lights” to control multiple bulbs at once).
- How to Connect Devices: You typically link smart home devices to Alexa by enabling a “Skill” in the Alexa app. For example, you enable the “Kasa Smart” skill for your TP-Link Kasa devices, or the “Wyze” skill for your Wyze cameras and bulbs. Alexa then discovers your connected devices.
- Budget-Friendly Routines: Utilize routines to automate daily tasks without needing expensive sensors or advanced programming. For instance, a time-based routine can turn on your coffee maker via a smart plug every weekday morning, or dim your Govee lights at sunset.
Google Assistant (Nest Mini): The Smart Sidekick for Google Lovers
The Google Assistant (Nest Mini) offers a compelling alternative, particularly if you’re already deeply embedded in Google’s ecosystem (Android phone, Google Photos, Gmail, Calendar, Chromecast, etc.).
- Strengths:
- Excellent Voice Recognition and Context: Google Assistant often shines at understanding natural language and follow-up questions.
- Deep Integration with Google Services: Seamlessly links with your calendar, search history, commute, and other Google services to provide highly personalized responses.
- Good for Android Users: If your smartphone is Android, the Google Home app and Google Assistant integration often feel more native.
- Routines and Home/Away Settings: Similar to Alexa, Google Assistant offers robust routines. It also has Home/Away Routines that can automatically adjust devices based on whether you’re home or out (using phone location).
- How to Connect Devices: In the Google Home app, you go to “Set up device” and then “Works with Google.” You’ll then link the account for your smart device brand (e.g., Wyze, TP-Link Kasa, Govee) to your Google Home.
- Budget-Friendly Automations: Leverage Google’s routines for similar automations as Alexa. For example, a routine for “Leaving Home” can turn off all lights, arm your camera, and adjust your smart thermostat.
Apple HomeKit: Premium Experience with Budget Workarounds
Apple HomeKit provides a highly secure, private, and seamless smart home experience, especially for those immersed in the Apple ecosystem. However, devices designed with native HomeKit compatibility often carry a premium price tag. For a budget smart home setup, this can be a challenge.
- Strengths:
- Strong Privacy and Security: Apple has built HomeKit with privacy at its core.
- Seamless Apple Ecosystem Integration: Control devices from the Home app on your iPhone, iPad, Mac, or Apple Watch. Use Siri for voice commands.
- Robust Automation: Create powerful automations based on time, location, sensor triggers, and more.
- The Budget Challenge: Most natively HomeKit-compatible devices are pricier. For instance, while you can get a Wyze Cam for $30, a HomeKit-native camera might start at $60-$80+.
- Budget Workaround: Homebridge (for the DIY Smart Home Enthusiast):
- This is where the true DIY smart home spirit comes in for HomeKit users. Homebridge is an open-source server that you can run on a low-cost device like a Raspberry Pi. It essentially acts as a bridge, allowing you to bring many non-HomeKit devices (like your TP-Link Kasa plugs, Wyze cameras, and Govee lights) into the HomeKit ecosystem. This means you can control them all via the Apple Home app and Siri, getting the HomeKit experience without buying expensive native devices.
- Caveat: Homebridge requires some technical proficiency to set up and maintain. It’s not for the absolute smart home for beginners but a fantastic option for those willing to learn.
- Budget-Friendlier HomeKit Devices: If Homebridge seems too daunting, look for more affordable HomeKit-compatible devices from brands like Meross, Eve, or Vocolinc. They often have reasonably priced smart plugs, light strips, or basic bulbs. The HomePod Mini (often around $99) acts as your HomeKit hub (called a Home Hub).
Cross-Platform Considerations
Can you use both Alexa and Google Assistant in the same home? Absolutely! Many users choose to have an Echo Dot in one room and a Nest Mini in another, utilizing the strengths of each. Most cheap smart home devices today (like those from TP-Link Kasa, Wyze, and Govee) are compatible with both Alexa and Google Assistant, so you’re not locked into one. Apple HomeKit, however, generally operates more as a distinct ecosystem, though devices brought in via Homebridge can still be controlled by Alexa or Google Assistant independently.
Ultimately, the best choice for integrating your smart devices on a budget depends on your existing tech ecosystem and your comfort level with a bit of DIY tinkering. Start with one assistant, link your chosen cheap smart home devices, and enjoy the unified control!
Conclusion
Congratulations! You’ve navigated the often-intimidating landscape of smart home technology and discovered that setting up a powerful, convenient, and truly intelligent living space doesn’t require a fortune. Your journey to a budget smart home setup is not just a dream, but a fully achievable reality.
We’ve explored how an affordable smart home starts with strategic planning and smart choices, proving that cheap smart home devices can deliver immense value and convenience. From selecting the best budget smart assistant like the Amazon Alexa (Echo Dot) or Google Assistant (Nest Mini), to understanding how to connect smart devices without a hub using Wi-Fi, you now have the knowledge to begin.
Remember our core philosophy for smart home for beginners: start small. Begin with impactful, essential smart home devices like affordable smart plugs and cheap smart lighting from trusted brands like TP-Link Kasa, Wyze, and Govee. These foundational pieces will offer immediate gratification and teach you the ropes before you expand into more advanced automations or incorporate protocols like Zigbee or Z-Wave.
This isn’t just about saving money; it’s about empowerment. It’s about taking control of your living space, making it work for you, and tailoring it to your unique lifestyle through the rewarding process of a DIY smart home. Don’t be afraid to experiment, learn from minor setbacks, and celebrate every small victory – like that first time you dim the lights with a voice command or have your coffee maker automatically brew before your alarm.
The world of smart home technology is constantly evolving, with new, even more accessible options emerging regularly. By taking these first steps, you’re not just buying gadgets; you’re investing in a more convenient, efficient, and enjoyable way of living. So go ahead, plug in that smart light, tell your assistant what to do, and enjoy the incredible convenience that your new, budget-friendly smart home brings. The future of smart living is here, and it’s perfectly within your reach.


Add your first comment to this post